
Duct Tape Dummies
Supplies
DTD are CRUCIAL to making your full costume. The better quality your dummy, the better the fit of your bodysuit.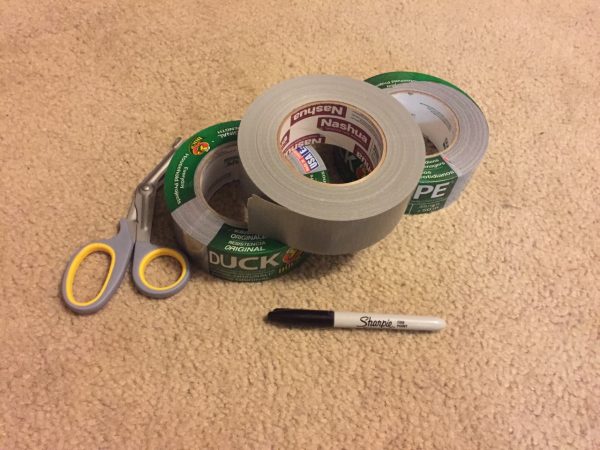
What you will need:
- Approximately 3-4 rolls DUCK BRAND ALL PURPOSE SILVER DUCT TAPE 45 or 60yd roll (you can always return extra, unopened rolls)
- a good pair of scissors (we recommend TRAUMA SHEERS- about 9$)
- permanent marker
- PAINTER COVERALLS
- paper towels
- 1 or 2 friends to help tape you up. The more hands helping, the quicker the process.
PLEASE MAKE SURE YOU HAVE ALL ABOVE MATERIALS BEFORE YOU START.
Making the DTD
Make sure you are nice and clean before making this. DTD's have a tendency to retain any funky odors. Please DO NOT leave dirty clothing in your DTD- this means socks, too.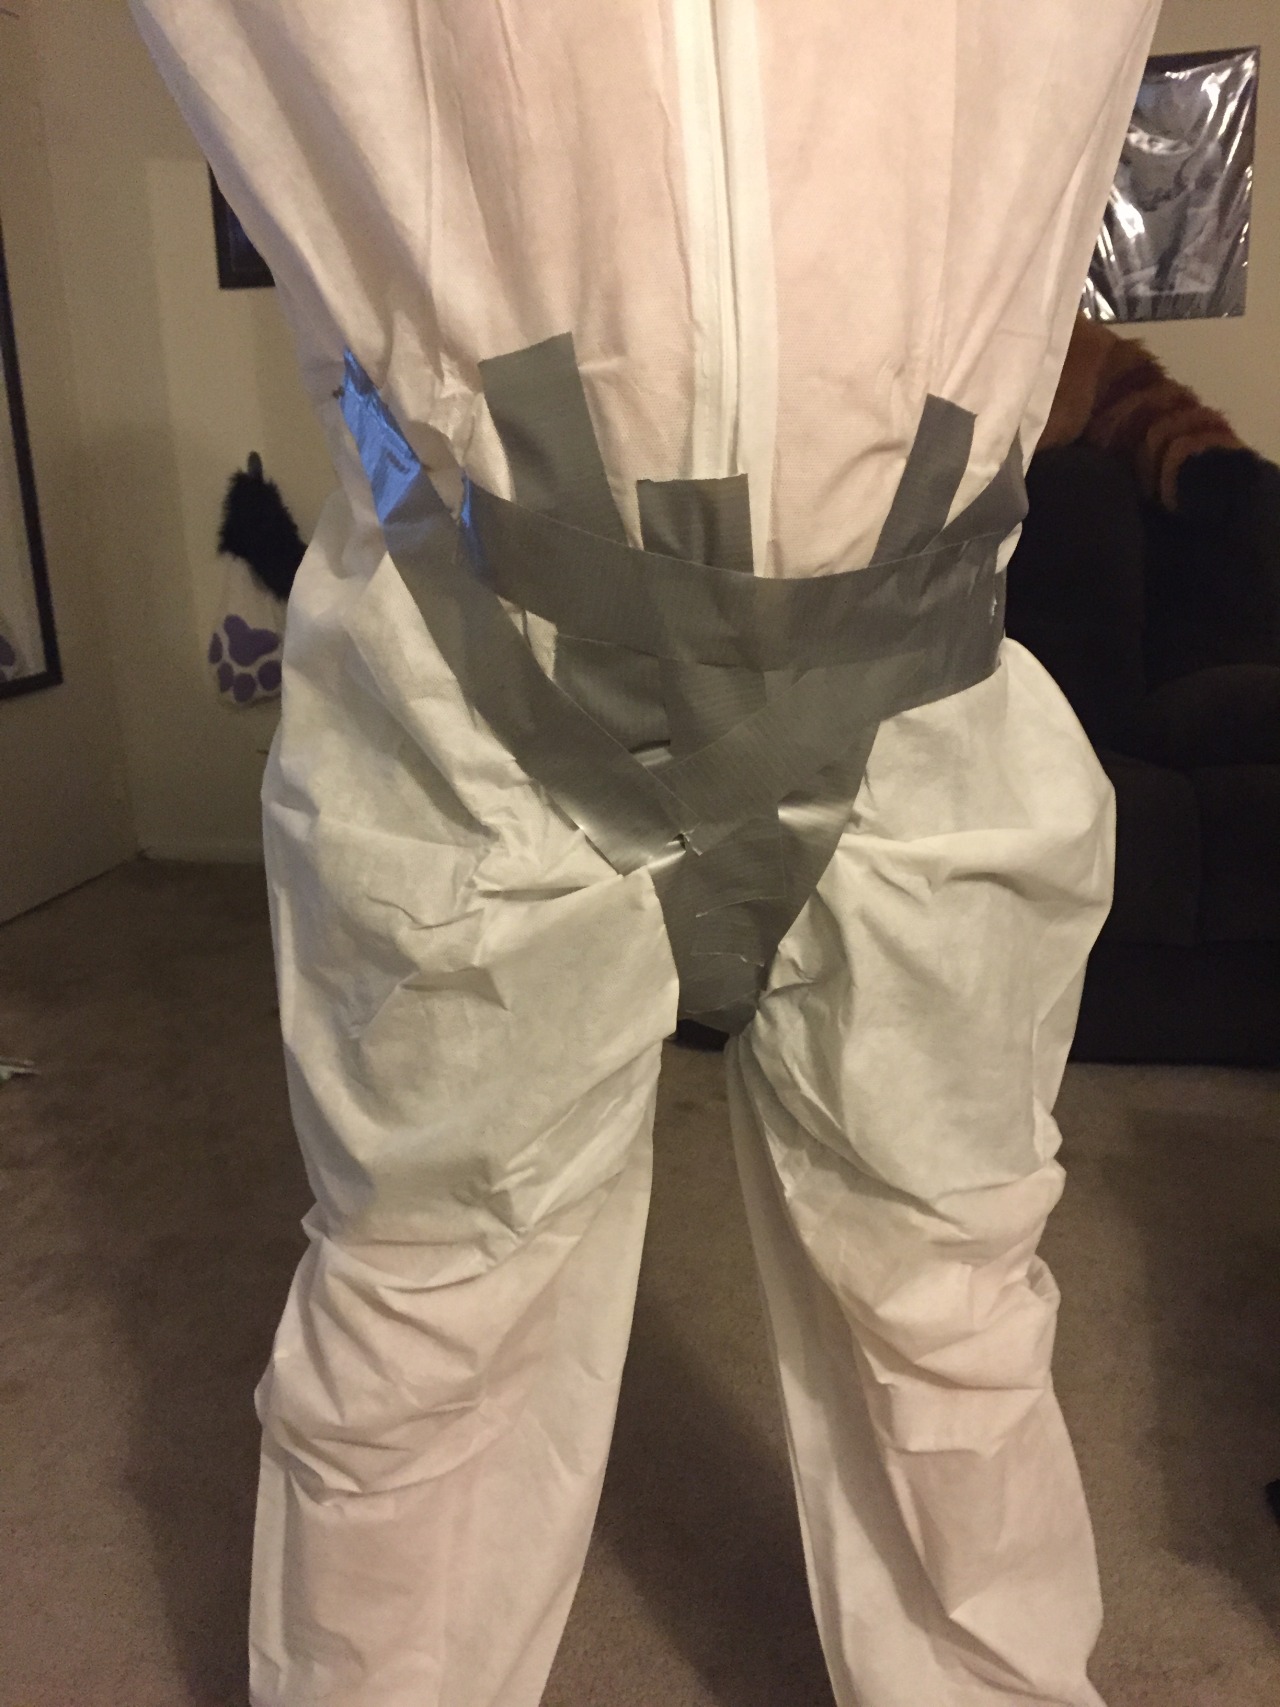 START taping at the groin. Pull the over all taught to the groin area and begin to lay stripes of tape.
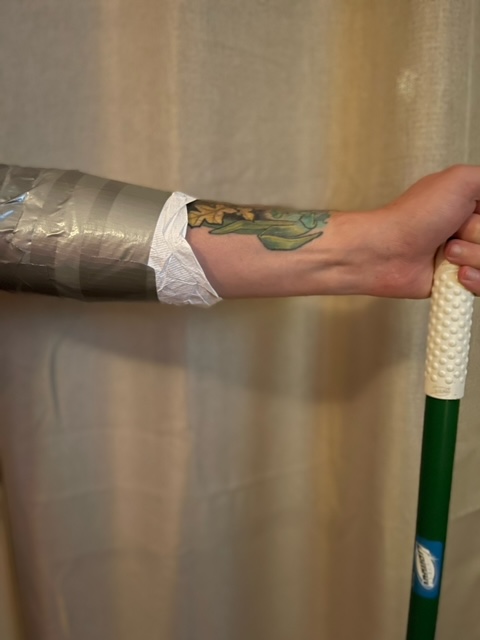 Painters smock ended here- so add some paper towels and continue taping.
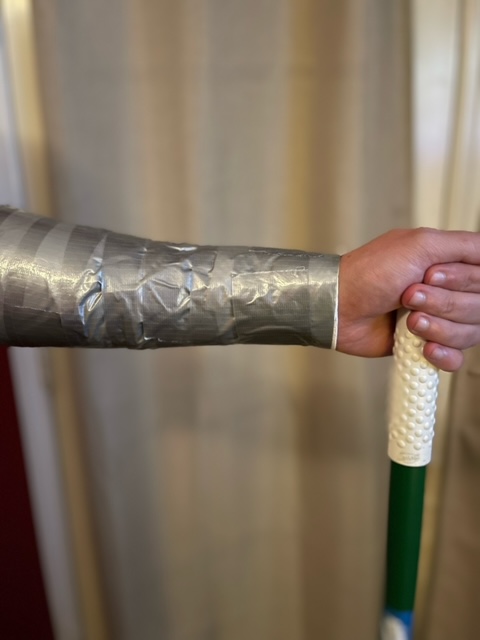 Tape all the way down to base of wrist/start of palm.
 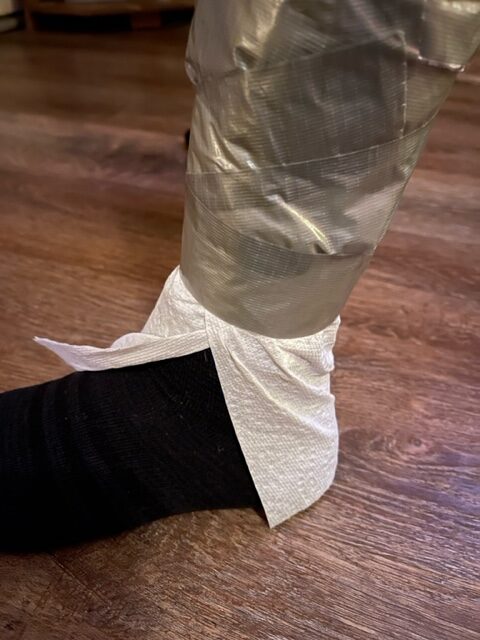 Added paper towels to extend around heel (please don't just tape of your sock)
 Tape just around the base of your heel- no need for your entire foot.
 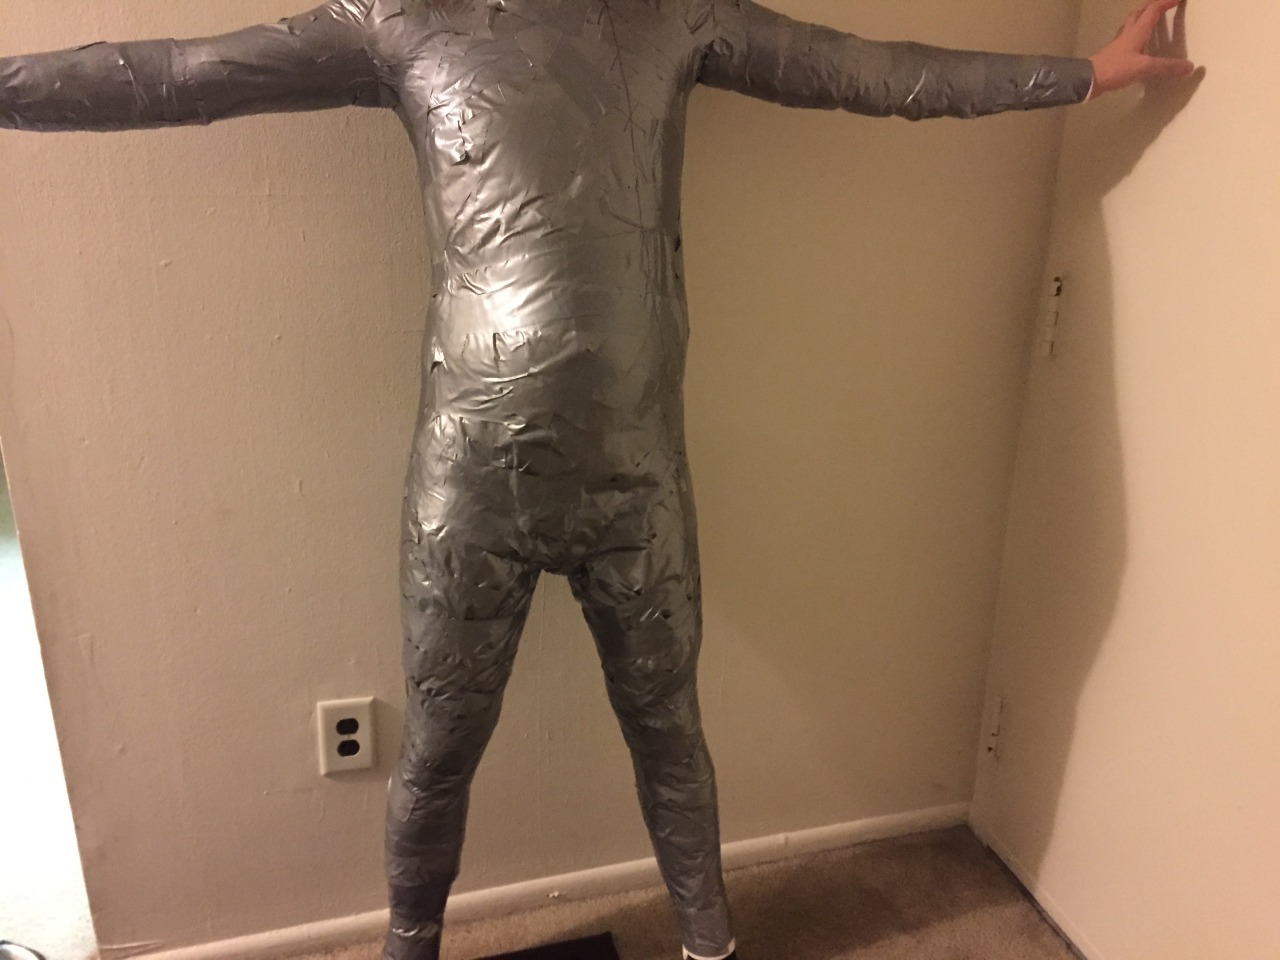 It is CRUCIAL that you are standing in the position above. Arms should be at a T angle, and legs spread slightly apart.
  On the BACK of your dummy write- Your name, your Email, your Characters name.
 - Put on your painters overalls. Make sure to have something on underneath too, such as a tank top and thin shorts, otherwise when the dummy is cut away you’ll be in the buff.
- START taping at the groin. Pull the painter smock taught to the groin area and begin to lay stripes of tape. Pull sections of tape in 6 inch strips. DO NOT hold the roll and spin it around the legs/arms/torso; this can cause the dummy to be too tight. Make sure to criss cross duct tape instead of one same parallel pattern.
- You should be laying duct tape in LAYERS. One single layer will not hold up.
- Once the groin and between the legs is done, you can tape down the legs, or up the torso.
- Please make sure you’ve watched the slideshow on the left as this will give you visuals!
- Layer tape. A good sturdy dummy yields the best body suit. Once completed, please check for weak spots/holes (there should not be any fabric visible).
- Now continue down from the groin and onto the legs. Make sure you don’t miss between the legs.
- Tape all the way down to the ankles, and just around the heel of your foot (you do not need to tape your entire foot). If you run out of fabric coverage, wrap a paper towel around the ankle and tape over this. You will do the same with the wrists. DO NOT TAPE OVER SOCKS.
- Tape up to the neck line. Get as close to the base of the neck as you can without making the wearer uncomfortable. Again, if you run out of fabric, you can use paper towels.
- The last part to tape is the arms. Have your arms straight out beside you like a T. Tape all the way down to the wrists, using paper towels to wrap around if you run short of fabric to tape over (you will most likely need paper towels at the ankles/foot and the wrist. PLEASE make sure you come all the way down just to wear your palm starts. Make sure the armpit area is done correctly, tape directly up to the actual armpit, wrap or cut excess fabric to prevent sagging if need be.
- Now check over the entire taped up model. make sure there are NO HOLES, NO weak spots, or NO thin spots. Have the wearer bend they’re knees a bit to keep them comfortable.
Last Steps
WHEW you're finished taping. Only a few more steps to go! (but these steps are still VERY important!)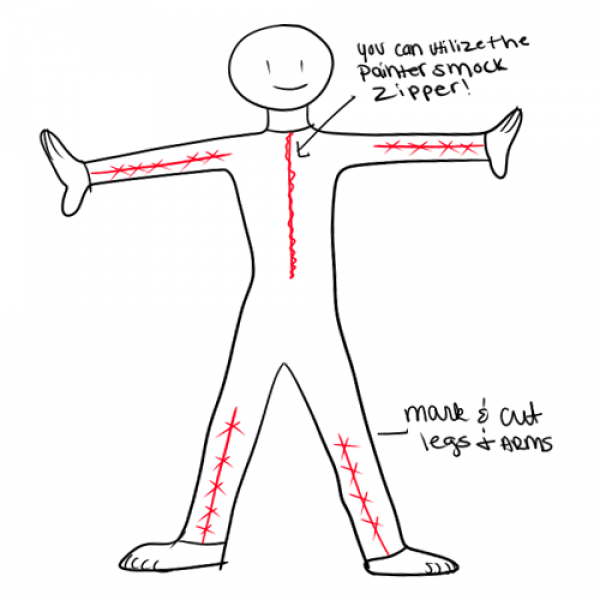
- Take a marker and write your NAME, EMAIL ADDRESS and your CHARACTERS name on the BACK of the dummy.
- Now mark where the tail will go with an X. The tail position should fall where your natural belt line sits (base of spine area)
- Your actual cut lines can come up higher. Please line and cut on the OUTSIDE of the LEG and ARM.(not from inner ankle to groin, and not wrist to armpit.)
- Now draw your cut lines with X’s on it This is where you will cut along. The X’s are so we can line them up and tape it back up! (your DTD should look this way BEFORE cutting it off. Make sure it is correct.) If you have to make additional cuts to get it off, please make sure you mark your cut line with X’s before doing so.
- -Cut slowly, and gently. Remember, your putting scissors directly onto someones skin, so go easy! (:
YOUR ALL DONE! YAAAAAY!!!
Now, roll it up, put it in a box, and send it in! Please send your DTD in a box 12x12x12 or less (this will save you $$!!)